Tuesday, March 11, 2014

Most Delicious Cake Recipe (and easy, too!)


This super simple cake recipe comes out beautifully every time. The batter takes about 5 minutes to whip up if your ingredients are prepped and it takes just about 20-30 minutes to bake. Every person who's ever tasted it requests more, almost immediately. It's my favorite go-to baking recipe and it's amazingly versatile. You can add just about anything!

What you will need for the basic cake recipe:

  • 1 cup butter, softened
  • 2 cups sugar
  • 4 eggs
  • 2 teaspoons vanilla
  • 3 cups flour
  • 3 teaspoons baking powder
  • 1/2 teaspoon salt
  • 1 cup milk
  • optional additions (see below)

What to do:

  1. Preheat your oven to 175 degrees Celsius or 350 degrees Fahrenheit.
  2. Grease/butter and flour a 9 x 12 ish cake pan.
  3. Cream together butter and sugar until well blended and a little fluffy. 
  4. Add eggs and stir until fully blended.
  5. Stir in vanilla.
  6. Sift in flour, baking powder and salt. Mix until fully incorporated.
  7. Pour in milk. Stir carefully (or it will splash!) until fully blended.

That's your basic vanilla cake batter. If you stop there and bake it, it will be absolutely delicious. BUT, you can make some additions - pretty much anything works. Here are some options:

  • Stir in a couple of generous handfuls of dried blueberries or raisins.
  • Stir in a couple of tablespoons of flavorful honey. I like the local Sudanese honey I get, but any tasty honey will work.
  • Stir in a few tablespoons of rose water or orange blossom water.
  • Stir in a few handfuls of chocolate chips.
  • Stir in a handful of chopped almonds and some almond extract.
  • Add a cup of grated carrot, squeezed dry-ish along with a 1/2 teaspoon of grated nutmeg.

OR, if you're adventurous, add a combination. I just made blueberry/vanilla/honey/orange blossom cake and it's amazing!

Then pour your beautiful batter into the pan and bake until the top springs back when pressed gently or a knife inserted comes out clean. This usually takes about 20-25 minutes for me.

Enjoy!

Sunday, January 6, 2013


Nutty Cauliflower Soup


This golden soup has a luscious, velvety texture and subtle sweetness. Start to finish, it's ready in under an hour.


What You Will Need:

  • 2-3 tbs of olive oil
  • One large onion, diced.
  • 2 cups of pumpkin, cubed
  • 4-5 medium carrots, sliced
  • 2 cups of sweet potato, cubed
  • 1 small head of cauliflower, chopped any way you like
  • 2-3 tbs peanut butter
  • 1 inch piece of ginger, peeled and chopped finely
  • 4 cups of vegetable broth, stock or water
  • 1 tsp. freshly grated nutmeg
  • 1 can of coconut milk
  • 1/4 cup chopped parsely
  • salt and pepper to taste
  • An immersion blender (unless you have some other method for pureeing large quantities of hot soup!)

Procedure:

  1. Sautee the onion in the olive oil until wilted.
  2. Add the pumpkin, carrots, sweet potato, cauliflower, ginger, nutmeg and liquid.
  3. Simmer until vegetables can be easily pierced with a fork.
  4. Turn off the heat and let the pot cool down until it stops bubbling.
  5. Using an immersion blender puree everything in the pot. Keep going until there are no chunks of veggies left. Be sure the immersion blender is completely submerged and not tilted, because the soup is still HOT and it will come flying up out of the pot and land on you if you're not careful. 
  6. Add coconut milk and peanut butter. Puree again until these are incorporated evenly throughout.
  7. Add salt and pepper to taste.
  8. Add chopped parsley and stir.
  9. Eat!

Thursday, April 5, 2012

The Best Soup Ever


I couldn't decide what to call this soup. It is, I suppose, a chicken soup. But it's so much more! I'll never go back to regular chicken soup again. Even my picky child was happy with this soup, veggies and all! The most surprising ingredient, if you're not familiar with seeing it in savory dishes, is peanut butter. I brought the leftover soup to work to share and it was rated 11 on a scale of 1 to 10. I promise it is worth trying!


For extra flavor, you can use the bones and/or carcass of the whole chicken if you've got them. I used the leftovers from a chicken I roasted the night before I made this soup. You can purchase a cooked rotisserie chicken and then use any leftovers for this soup. If you do use bones or the whole chicken carcass, you can pull them out of the soup after they've simmered for a while, before you add back the pureed veggies, allow the chicken to cool a bit, and then pull the meat from the bones and drop it back into the soup.

What you'll need:
  • 8 cups of liquid (vegetable broth or chicken broth)
  • About 5 carrots, sliced into thin rounds
  • 1 large potato, cubed or diced
  • 2 cups of pumpkin, cubed or diced
  • 1 large onion, diced
  • Cooked chicken, about 2 cups of bite sized pieces.
  • 4-6 tablespoons of unsweetened peanut butter
  • 2-3 cloves of garlic (roasted garlic would be even better!)
  • 2 large tomatoes, roughly chopped
  • 1 cup of noodles (optional) I like thin egg noodles best, but add what you like!
  • juice of 2 limes
  • 1/2 cup chopped fresh parsley
  • 1/2 cup chopped fresh dill
  • salt, to taste

What to do:
  1. Bring your liquid to a boil in a large soup pot.
  2. Add the onions, potatoes, pumpkin and carrots. Turn the heat to medium and allow to cook for 15 minutes or until the vegetables are tender.
  3. Remove about half of the vegetables from the pot and put them in a food processor or blender. Be careful! The veggies are hot. Do not use a food processor with a fitted lid that seals completely. Steam must be able to escape while you puree.
  4. Add the chicken pieces to the soup pot and leave to simmer.
  5. To the vegetables in the blender/processor, add about a cup of the liquid from the soup, the peanut butter, the garlic and the chopped tomatoes.
  6. Puree vegetable and peanut butter mixture until smooth, adding more liquid if necessary.
  7. Return the pureed mixture to the soup pot and stir until completely incorporated. Your soup should be a bit thicker and a beautiful shade of yellow or orange.
  8. Add noodles.
  9. Simmer for about 10 or 20 minutes longer.
  10. Turn off the heat.
  11. Add the chopped herbs and stir them into the hot soup.
  12. Add the lime juice and stir.
  13. Taste the soup and add salt to taste.
Enjoy!


Sunday, March 4, 2012

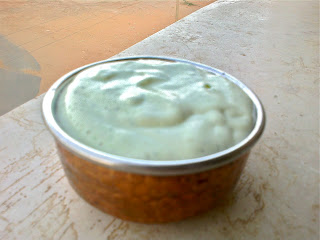
Who Needs Sour Cream?


when you can make an amazing substitute in 5 minutes. No, it's not healthier, but when you're in Sudan and sour cream is nowhere to be found, this will make you forget why you ever wanted it!


What you will need:
  • 1 cup goat cheese or other tart, creamy cheese or a milder cheese like farmer's cheese or cottage cheese
  • 1/2 cup heavy cream
  • 1 clove of garlic
  • 1/4 cup chopped fresh parsley (or another fresh herb if you prefer)

What you should do:
  • Place all ingredients in a food processor or blender.
  • Pulse until combined and then puree until smooth.

Serve atop baked potatoes or as a dip!

Monday, November 1, 2010

Jib's Morning Smoothie


Jibreel doesn't like to eat breakfast some mornings, but he's always willing to have a treat. So this smoothie is his morning treat:

1 frozen banana
5 frozen strawberries
half cup of milk
half cup of
yogurt
1 tablespoon natural peanut butter

Blend until super smooth and pour into a glass. Enjo
y!

Thursday, April 22, 2010

Pumpkin Mulah (stew) with (or without) Lamb

This pumpkin stew was my mother's favorite dish while she was pregnant with me. I love it as well. It's one of the few Sudanese dishes that is sweet and savory at the same time, the sweetness courtesy of the pumpkin and onions, and a little sugar if necessary. The meat (if you choose to add any) will be flavorful and tender as long as you are careful to cook it on a low flame, slowly. Don't be impatient, like I sometimes am, and turn the flame up.

I've been looking for a recipe for this pumpkin mulah for quite some time and a friend of mine recently managed to get this recipe from her mother (while her mother was making it for lunch). So, SHUKRAN, Samiera, Sara's mom. This recipe is much appreciated!


What you need:
  • 3 medium sized onions, diced
  • 2 tbs oil for sauteeing (I like olive oil, but use what you like)
  • 1/2 pound of lamb, chicken, or beef for stewing, cut into bite sized pieces. Chicken can be left on the bone, cut into legs, thighs, etc.
  • 2 cups of pumpkin, cut into (1 inch) cubes
  • 3 tbs tomato paste or 2 cups of peeled, diced tomatoes or a large can of peeled, diced tomatoes
  • salt
  • black pepper
  • 2 tsp kazbarah (I know, I know! But I can't find a translation! Put in whatever spices you like!) ... perhaps coriander! It is coriander - but it's not the fresh green kind. I think it's the seeds, ground. So use that :)
  • 1 tsp cinnamon

What to do:
  1. Sautee the onion in a little oil until they're soft/wilted.
  2. Once they're wilted (but not cooked till brown or anything) add just enough water to cover the onions.
  3. Leave on medium heat until the water is evaporated. You want the base to be thick because the pumpkin lets out a lot of water as it cooks! So make sure your base is thick before you add the lamb and pumpkin later.
  4. Add the meat (if desired).
  5. Add the spices.
  6. Stir until the onions have disintegrated, basically until it all melts into a saucy texture.
  7. Add either tomato puree or peeled, diced tomatoes.
  8. Leave it on a low flame until the meat cooks.
  9. Or if there's no meat, add the pumpkin.
  10. Leave on low heat until the pumpkin cooks.
  11. When the pumpkin is cooked, you're done, but feel free to leave simmering for longer to soften the meat and/or pumpkin more.
Tip: If your pumpkin isn't very sweet, add a few tablespoons or more of sugar or honey to sweeten the sauce.

Saturday, April 10, 2010

Garlicky Chicken Strips


My son loves chicken nuggets and chicken fingers. I am trying to get away from buying pre-packaged frozen foods, so I made these chicken fingers with actual chicken (no fillers!) My son was very happy with the end result and also helped me prepare them by using a fork to give the chicken pieces their egg baths. He doesn't like gooey things, but if your kids do, have them help with the whole breading process. It's fun!

What you will need:

  • 1 lb. chicken breast, cut into strips or nuggets
  • 3-4 eggs, scrambled, seasoned with 1 tsp of salt and 1 tsp of pepper
  • 2 cups of flour
  • 2 cups of breadcrumbs
  • Oil for frying (I use a mixture of corn and olive)
  • Marinade - see recipe below or use any marinade you like

What to do:
Place cut chicken pieces into marinade and mix well to ensure all pieces are coated. Place in the refrigerator to marinate for at least an hour, or as long as 6 hours.

When you are ready to prepare the chicken for frying:

  1. Place the flour in a tray or pan with sides like a cake pan to limit the mess
  2. Place the breadcrumbs in another tray or pan.
  3. Take a piece of chicken and wipe off some of the excess marinade.
  4. Put the piece of chicken it in the egg, coating completely.
  5. After coating with egg, let the excess egg drip off and coat the piece in flour.
  6. Shake off excess flour and put the chicken back into the egg.
  7. Let excess egg drip off and coat the piece completely with bread crumbs, turning over until the outside of the chicken is coated and feels quite dry.
  8. Repeat until all pieces are coated, working carefully to ensure that the coating stays on the chicken. You can sprinkle extra bread crumbs on the coated pieces to stop them from sticking to each other.
  9. When all pieces are coated, heat about 1/2 inch of oil in a frying pan over a low-medium or medium flame. The oil is ready for frying when a drop of water dropped into it "pops" noisily. Be careful, if you use this method, though. Hot oil hurts! You can, instead, put the end of a wooden utensil into the oil. If the oil bubbles around it, it's hot enough.
  10. Place chicken pieces into the pan carefully, not touching. They should sizzle when you place them in, but gently. If the oil is loud and furious, it's too hot. Turn it down a bit.
  11. When pieces are golden on one side, or a little brown for extra crispiness, turn them to the other side. When the second side is browned, remove to a plate lined with paper towels. Press down gently on the chicken to make sure it feels firm but not hard. If the chicken is too soft, it's probably not cooked through.
  12. When you're done frying, they're ready to serve!

Yogurt and Garlic Marinade:

1 cup of plain yogurt
5 or 6 cloves of garlic, minced or crushed
1/2 cup of chopped parsley
juice of one lime

Mix marinade ingredients together.

Friday, February 12, 2010

Lamb and Veggies with Rice

I threw this together based on some tips my cousin, Montassir gave me about making lamb tender. He does a version with just lamb and a little onion and garlic that's delicious. I love men who can cook! This recipe has some veggies in it and I use the broth to make the accompanying rice. Even my son ate it and asked for seconds, and he may be the pickiest person I know!

Ingredients

For the lamb:
  • 2 tablespoons of olive oil
  • 3 or 4 cloves of garlic, chopped
  • 3 large onions, sliced thinly
  • 3 or 4 large carrots, sliced into rounds, about 1/4 inch thick
  • 2 cups of pumpkin, cubed
  • 2 zucchini, quartered the long way and sliced about 1 inch thick
  • 3 large potatoes, 1 inch cubes (peel them if you like)
  • 1 apple, diced
  • 1/2 cup of parsely, chopped coarsely
  • 1 pound of lamb pieces for stew or cutlets
  • 1 cup of lamb broth or water
  • 1/2 cup of apple juice or cider
  • salt
  • pepper

For the rice:
  • 2 cups of rice
  • 1 onion chopped fine
  • 1 carrot, diced
  • 1/4 cup of parsley, chopped fine
  • 4 cups of liquid (broth or water, the broth reserved from the lamb, and apple juice in whatever combination you like)

Directions

For the lamb:
  1. Pour the olive oil into the pan. Heat it over medium heat.
  2. When the oil is hot, put the lamb into the pan, ensuring contact with the bottom of the pan.
  3. Sprinkle a little salt over the lamb. Allow it to cook for 2 or 3 minutes, until it gets a little brown. Don't move it around.
  4. When it's gotten a little color, turn each piece over to get some color on the other side.
  5. Turn the heat down to low.
  6. Put your onions in a layer covering the lamb. Sprinkle on a little salt and pepper. Then the carrots, pumpkin, zucchini, potatoes and apples. Just layer them, sprinkling on some salt and pepper between layers. No need to stir the pot.
  7. Pour in your liquids, bring the pot to a simmer. Cover it. Leave it to simmer.
  8. After about an hour (or when your veggies are tender if you're in a rush) sprinkle on the parsley.
  9. Take some (about a cup) of the liquid from the lamb pot and put it to the side for your rice. You can add some more broth to the lamb (or juice if you like things a little sweet) if you want more broth.
  10. Leave it to simmer for as long as you want or are able. The lamb just gets more tender and the broth more tasty.

For the rice:
  1. Add a few tablespoons of olive oil to the pot (another pot :) and heat it over medium heat.
  2. Saute your onions and carrots until softened a little.
  3. Add in your rice, dry, and mix until the grains are coated with the oil. They'll look a little translucent.
  4. When the rice is coated, pour in your liquid and stir well.
  5. Taste the liquid. If it needs a little salt, add some. It should be flavorful.
  6. Bring the rice to a boil, then reduce to a simmer.
  7. Cover and leave it for about 15 minutes. Check to see if it's ready or needs a little more time to absorb the liquid. Mix in your parsley at the end.
Serve the lamb and veggies and broth over the rice. Enjoy!

Wednesday, January 27, 2010

String Beans and Chicken - Simple


I threw this together tonight. Took me 5 minutes to prepare it and 15 minutes to cook it. My child was thrilled, calling it the best string beans and chicken ever. Yum!

Chicken
  • 1 lb. chicken breasts, on or off the bone
  • 1 tsp of salt (or to taste)
  • 1 tsp of ground black pepper (or to taste)
  • 1 tsp cumin
  • 1 very juicy lime or 2 not so juicy limes
  • 1/4 cup of chopped parsley
  • olive oil to just cover the bottom of your pan
  1. Sprinkle the spices and half the parsley, but not the salt, over your chicken.
  2. Squeeze on the lime juice, catching the seeds. Rub into the chicken. At this point, you can leave the chicken to marinate for as little as 5 minutes, or in the refrigerator all day.
  3. When you're ready to cook it, sprinkle on the salt and rub it around to ensure it's spread evenly.
  4. Pour your oil to just cover the bottom of your pan. Let the pan heat up over medium heat.
  5. Put your chicken in, flat against the bottom of the pan when the pan is hot enough to give you a little sizzle. Leave it for 5 or 6 minutes, until the chicken browns some. (This is a good time to start your string beans!)
  6. Then turn it over, turn the heat down a little, sprinkle the remaining parsley on top and let it finish cooking. Don't over cook.
  7. Test to see if it's done by pressing down a little on the meatiest part. You want it to have some give, but not be too soft. Once it's hard, it's overdone... don't let that happen!
  8. Take it off the heat, out of the pan, and enjoy! Add an extra squirt of lime juice if you're so inclined.

String Beans
  • 1 pound of frozen or fresh string beans.
  • 1/2 tsp powdered garlic or 1-2 cloves crushed fresh garlic
  • 1 juicy lime or 2-3 not so juicy limes
  • 1 - 2 tsp of butter, depending on your taste - or none. It's not necessary, just tasty!
  • 1 tsp salt (or to taste)
  • 1 tsp ground black pepper (or to taste)
  • 1/4 cup parsley, chopped fine
  1. Prepare your string beans: If you use fresh string beans, trim them and blanch them for 5-7 minutes or so in boiling salted water. If you're using frozen string beans, prepare according to directions.
  2. When they're done, drain them and return them to the hot pan.
  3. Drop in the butter first, and mix a little to melt it.
  4. Add the rest of the ingredients and stir.
  5. Done! Delicious.


Tuesday, October 20, 2009

Tomato Jam


I saw this recipe while searching for jam recipes for my class to make after our visit to Saeed Food Factory where jam is made. I was intrigued by the idea of tomato jam, and further excited because all of the ingredients are readily available here in Sudan. The jam is delicious, and I'm thinking it would be very easy to make an excellent ketchup as well. I'll let you know if I try that.

Ingredients:
  • 1 1/2 pounds of good ripe tomatoes, diced.
  • 1 cup of sugar
  • 1 teaspoon of salt
  • 1 tablespoon of fresh ginger, grated or minced
  • 2 tablespoons of freshly squeezed lime juice
  • 1 teaspoon of cinnamon
  • 1 teaspoon of cumin
  • 1 jalapeno pepper, seeded (or not if you like more spice) and minced

Directions:
  1. Combine all ingredients in a pot.
  2. Bring to a boil, then reduce to a simmer.
  3. Continue to simmer over low-medium heat until the mixture thickens to a jam consistency, stirring occasionally. This should take about 60-90 minutes.
  4. Enjoy!
Keep your jam in the refrigerator for up to a week. Makes about 1 pint

Saturday, September 12, 2009

Apple Banana Pancakes

I would like to cook breakfast every morning for my child, but there's no way I would actually get around to doing it. So I've found an acceptable substitute that makes us both happy. I make a big batch of pancakes on a night when I feel up to it. I freeze half and refrigerate half. In the morning, my son takes two pancakes from the fridge, sticks them in the microwave for 10 or 15 seconds, tops them with a tablespoon of maple syrup and chows down. When the half batch from the fridge is done, I move the rest down from the freezer. I know pancakes aren't the most nutritious breakfast, so I mix in some fruit to make them a bit healthier. The pancakes are delicious and so easy to whip up. The recipe below makes about 25 medium-sized pancakes. Enough for breakfast and after school snacks for the week. Sometimes for lunch I make him a pancake peanut butter sandwich!

Ingredients:

wet ingredients
  • 2 1/2 cups of milk
  • 2 eggs, beaten lightly
  • 2 tablespoons of melted butter or oil
  • 2-3 ripe bananas, mashed
  • 1 large apple, diced (about 1/8 inch dice)
  • 1 tablespoon of vanilla
dry ingredients
  • 2 1/2 cups of flour
  • 2 tablespoons of baking powder
  • 1 teaspoon of salt
  • 1/8 cup of sugar (or to taste)

Directions:
  1. Mix the dry ingredients in a large bowl. Set to the side.
  2. Mix the wet ingredients in a separate bowl.
  3. Pour the milk mixture into the dry ingredients and stir until most of the lumps are out.
  4. Heat your pan or griddle over medium heat for a couple of minutes.
  5. Use a small ladle or large spoon to drop/pour spoonfulls of the pancake batter onto your pan. Be sure to scoop from the bottom of the bowl so you get some apple and banana pieces in each pancake.
  6. Leave the pancakes alone until the edges begin to look dry and there are bubbles appearing over the entire surface of the pancake! Then flip.
  7. Check that the pancake it done by pressing down gently with your finger. When it's done, the pancake should spring right back when you remove your finger.
  8. Enjoy with maple syrup, peanut butter, jam, or with nothing at all!

Wednesday, August 26, 2009

Sh'aria bi Lebben

I do realize it's been a while. I've got some other blog things going on and also I've been a little busy with my transition. But here it is, the first recipe from Sudan. This is Sh'aria bi Lebben, or Angel's Hair Pasta with Milk. It tastes a lot like rice pudding. Delicious for breakfast or dessert. The recipe is vague, as are most recipes here. But it's not easy to mess this up.

Ingredients:
1 package of angel's hair pasta/vermicelli (this is the curly kind that's usually used)
water
salt
oil
sugar
milk

vanilla (optional)

Directions:
  1. Put a few cups of water into a medium or large saucepan. Add about a teaspoon of salt and a few tablespoons of oil.
  2. Bring the water to a boil and add the noodles.
  3. Cook the noodles for longer than you need to and until most of the water is done (but don't let it get dry).
  4. Add milk to cover the noodles and a little more, until the milk is about a half inch to an inch over the level of the noodles.
  5. Add sugar to taste. If you like things sweet, add up to a half cup. Less sweet is fine, too. This is totally up to you. I think vanilla would be nice, as well, so feel free to add a teaspoon or so.
  6. When the milk starts to bubble, start stirring. Keep stirring until the milk and noodles are thickened somewhat.
  7. Leave it to simmer for another couple of minutes.
  8. Turn off the heat and leave it to cool for a few minutes.
  9. Pour/spoon into bowls. Let cool.
  10. Enjoy!
Tips:
Add raisins for a slightly different twist. Add them when you add the milk so they have a chance to plump up a little.
Top with a little cinnamon.
Add almond flavoring instead of vanilla, if you like. Neither is necessary.

Monday, July 27, 2009

Fig and Walnut Empanadas


I served these little empanadas at my going away party. I had one with the first guests, and went back a while later for a second. They were gone! There were some requests for the recipe, so here (to the best of my recollection) it is.


Fig and Walnut Empanadas:

Filling:
  • About 20 dried figs, diced (If there are hard stem bits, trim those off first)
  • 1/2 large sweet onion, diced
  • 1/4 cup toasted walnuts, coarsely chopped
  • 1 cup apple juice
  • salt to taste
  • 1 tablespoon of oil or butter for frying onions

For empanadas:
  • 10 empanada discs, defrosted
  • Oil for frying
  • Confectioners sugar for garnish

Making the filling:
  1. Saute diced onion in a small saucepan until softened and translucent. If you like, keep cooking them until they begin to brown a little.
  2. Add chopped figs and apple juice.
  3. Bring to a boil. Then lower heat and allow to simmer until figs are softened, at least 20 minutes. If the mixture begins to dry out, add a little water to allow figs to continue to soften.
  4. When figs are soft, allow the mixture to reduce until it is very thick and a little syrupy. Remove it from the heat.
  5. Toast your walnuts in a pan on medium heat until you can smell them first, but don't burn them! Add the chopped walnuts to the fig and onion mixture.
  6. Let mixture cool for 10 minutes.

Filling the empanadas:


  1. Get out your empanada discs. Take the first disc.
  2. Cut it into 2 equal halves.
  3. Place 1 or 1 1/2 teaspoons of the filling into the middle of each half.
  4. Take the two corners of one half and pinch them together.
  5. Pinch around the edges firmly, carefully pressing air out and making sure the empanada is securely sealed. Some people use a fork to seal the edges and make them pretty, but I usually end up poking holes in the dough with the fork tines.
  6. Repeat this process, laying your assembled empanadas on a plate, but not touching each other.

Fry your empanadas:
  1. Put enough oil in your pot to come up about 1 1/2 inches.
  2. Heat the oil on medium heat until small bubbles come up when you place a wooden implement (like a spoon handle) into the oil.
  3. Drop in an empanada. If it doesn't immediately start bubbling gently, your oil is not hot enough. Wait another minute to put in the others. Fry as many as you can fir with a little room to flip.
  4. Cook on one side until golden brown. Flip, fry on the other side until golden brown.
  5. Remove finished empanadas to a plate lined with paper towels to drain off some of the oil.
  6. Place your empanadas on a serving plate. Using a strainer or sifter, sprinkle a light coating of powdered sugar over the top of the empanadas.
  7. Serve warm!

Friday, July 17, 2009

Cream Cheese Raspberry Amaretto Frosting


I'm getting ready for my going away party tomorrow, the grown up Leaving on a Jet Plane event. I'm working on a cake which I will, of course, take pictures of when it's done. This is a simple cream cheese frosting with a twist. I'm using it for my Devil's Food cake (from a box mix). Quick, easy, and so delicious.

Cream Cheese Raspberry Amaretto Frosting Recipe:

  • 2 8 oz. packages of cream cheese, softened
  • 1 stick of butter, softened
  • 1 lb. of confectioner's sugar (powdered sugar)
  • 1 tablespoon of almond extract
  • 3 - 4 tablespoons of Amaretto liqueur
  • 2 tablespoons of seedless raspberry jam
  • 2 - 3 tablespoons of milk, if necessary to thin the frosting


  1. In a large bowl, use a blender on medium speed to blend the butter and cream cheese.
  2. Add the almond extract and Amaretto liqueur. Blend until smooth.
  3. Add the raspberry jam. Blend until smooth.
  4. Add half of the sugar. Blend until fully incorporated.
  5. Taste. (This is important!) Decide if you want it sweeter. Add sugar to taste and blend until smooth. Use a little milk to thin the frosting if you want it thinner.
  6. Spread on your favorite cake and enjoy!

Thursday, July 9, 2009

Roasted Tomatoes


As I prepare to move to Sudan, I'm thinking a lot about what I will miss. Perhaps that's why I've been obsessed with avocados lately. One thing I will NOT miss are American tomatoes. I mean, I'm sure there are good ones out there, but 9 times out of 10, what I find at the store are mushy, watery-tasting tomatoes. Summertime tomatoes are better than wintertime tomatoes, but unless you have your own garden or are visiting a greenmarket, the tomato situation is usually not so great.

Sudanese tomatoes are always fresh. If you don't get them while they're fresh and ripe, you don't get them. No cold storage. No shipments from abroad. And sometimes, when the weather is over 120 degrees for days at a time, there are no tomatoes. Those are sad days, but for the 10 months of the year that tomatoes are plentiful, no American tomato can hold a candle to a tomato grown on the banks of the Nile river.

I eat Sudanese tomatoes happily. Wash, eat, period. Nothing else necessary. For breakfast, tomatoes with a little feta cheese. For a dinner salad, maybe diced tomatoes with onions and a little lime juice and salt. It doesn't get any better.

Here in New York, though, it takes a little effort to bring out the tangy sweetness of tomatoes. I find the easiest way to do that - and also the easiest way to make a pasta sauce - is by roasting grape (or cherry) tomatoes. It's so simple and so tasty that once you try them you'll be roasting little tomatoes constantly and looking for ways to use them!

Roasted Grape (or Cherry) Tomatoes:


  • Grape or Cherry Tomatoes (as many as you want)
  • Olive oil (enough to just coat the tomatoes)
  • salt
  • pepper
  • garlic cloves (optional)

  1. Preheat your oven to 425 degrees.
  2. Prepare your tomatoes for roasting by tossing them in a bowl with a little olive oil. Make sure they're all pretty well coated.
  3. Spread the tomatoes in a shallow pan (glass or metal).
  4. Sprinkle them with salt and pepper.
  5. If you want to roast garlic at the same time, just take a piece of tin foil, place the garlic cloves on it, add a drop of olive oil, salt, and pepper, wrap them up, and throw them into the pan with the tomatoes.
  6. Pop the pan into the oven and wait. After a while, you may hear little popping noises. Yes, the tomatoes are popping. You want this to happen so they can release some of their liquid.
  7. How long you roast the tomatoes for is up to you. I'd say roast them for at least 1/2 hour. As you roast them longer, they get sweeter and the flavor concentrates more, so check on them every 5 or 10 minutes and take them out when you're happy with what they look and taste like.
  8. Pour this over fresh pasta with the tomato liquid that is in the pan, and you've got an easy, delicious and healthy sauce. If you roasted garlic, mash it up and stir it in.

Here's a before and after picture that I did not take. Sorry. No tomatoes in the house!


Notes:
  • You can roast other veggies at the same time. Try zucchini, onion (in chunks), and mushrooms (sorry, Toni. Other people like them!) Actually, I love roasted mushrooms.

Wednesday, July 8, 2009

So Simple - Fresh Pasta

Several months ago, thanks to Claudine's facebook status, I was craving pierogi. If you've never had pierogi (a.k.a. varenyky) they are little dumplings filled with - well, whatever you like. Now, if you've never had them before, do yourself a favor and head to the East Village and find a Polish, Russian, or Ukrainian diner. If you haven't tried them, you won't have a good idea of what they should look and taste like.

Pierogi are similar to ravioli. Potato, cheese, cabbage, and meat are all traditional fillings. If you're like me, you make a filling from whatever happens to be in your refrigerator and pantry. So I looked up a really simple pierogi recipe and started making pierogi.

Actually, this post is not about pierogi, though you should feel free to follow the link above and try making them. Making pierogi made me realize how easy it is to make a pasta dough! The pictures I'm posting are of a whole wheat dough, which I'll warn you, is much harder to work with than a dough made with all purpose flour.

Here's a basic pasta recipe:
  • 3 cups of flour
  • 3 eggs, lightly scrambled
  • that's it... really!


Put your flour in a mound on a large, clean, flat work surface. Make a hole in the middle and pour your eggs into it.

Use a fork to incorporate flour into the eggs little by little.


Now if you're really careful, you might be able to get all the egg and flour combined. What usually happens to me is that the egg finds it's way out of it's little well and starts to run all over the table. At that point, just use your hands to finish combining the egg and flour.

Knead the dough for 5 minutes or so. It should get nice and smooth and springy to the touch. (By the way, this is a good ab workout!) If it's sticky, dust it with a little more flour.

Wrap the dough in plastic wrap or put it in an oiled or floured bowl and cover it with a damp towel. Let it rest there for 20 or 30 minutes.

After the dough has rested, dust your (clean) rolling surface with a little more flour, grab a handful of dough and roll it out.


If you have a pasta machine you don't have to do much rolling. Just roll it thin enough for the first setting. Feed it through the rollers, each time making it a little thinner (turning the dial one number up). If the dough starts to get too long to work with, just cut it in a half and keep going. When you get the dough as thin as you want it, feed it through your cutting blades to make linguine or spaghetti or whatever you like.


If you don't have a pasta machine, this is where the hard part begins. You want to roll your dough really, really thin to about 1/16 of an inch. If it starts to spring back too much as you roll it, give that piece a rest (under a damp towel) and come back to it later. After you've rolled your dough out, you can flour your dough, roll it into a cylinder and slice it. Shake out each noodle soon after cutting so they don't get stuck. Or your can use a straight edge to cut your noodles. Or you can freehand it for some really interesting, rustic-looking noodles :)

I recommend cooking your pasta right after you make it. Boil a pot of water with a fair amount of salt (your water should taste a little salty). Drop your noodles in a boil until they float. Stir them a little to make sure they don't stick to the bottom of the pot. This should take no longer than 2-3 minutes!

If you want to dry your noodles, you can hang them on a dowel. You can lay them flat on a floured surface, or on a towel.


I'll post some simple sauce recipes soon... Enjoy your pasta!

Notes:
  • You can try substituting some whole wheat flour, but I wouldn't go over a cup. Using whole wheat flour increases the fiber and makes for a nice flavor, but it's very hard to work with if you're rolling it out entirely by hand. If you're using a pasta machine, it's not hard to roll out, but it's more brittle.
  • Try adding some finely chopped herbs. This looks really pretty in a wide noodle.
  • Try adding some egg yolks for richness.
  • Try adding a bit of carrot puree, beet puree, or spinach puree for color.

Monday, July 6, 2009

Guacamole Hamburger


Dinner tonight was just
too good. I had to share. If you are a vegetarian or vegan, this is not for you, because tonight I was craving a nice, juicy, flavorful hamburger. And since drinking those Avocado Milkshakes, I still have avocados on my mind. And though this was a bit of an experiment, the Guacamole Hamburger turned out wonderfully. The guacamole itself is heavy on the lime and garlic, as that's how I like it best. The burger is so juicy and flavorful. The cool guacamole and hot burger are made for each other.

Disclaimer: I never said this was a healthy dinner!


Hamburger Recipe:
Serves 4

  • 1 pound of ground beef (ground chuck makes the best burgers, but you can use something leaner if you like!)
  • 2 tablespoons of ketchup
  • 2 tablespoons of honey
  • 2 tablespoons of fresh lime juice
  • 1/2 teaspoon of seasoned salt (I like Lowry's Seasoned Salt. You could just add a 1/2 teaspoon of salt.)
If you're working quickly you can let the pan heat up on medium heat while you combine your ingredients!
  1. Combine the ingredients gently. Don't squash the meat too much.
  2. Make wide, thin patties that will cook quickly, again, not compressing the meat too much while you form the patties.
  3. Drop your patties in the pan and LEAVE THEM ALONE for at least a couple of minutes. DON'T use your spatula to press the patty down onto the pan.
  4. When you see that the edges are a bit cooked or check underneath and see that the patties are browning a little bit, flip them and LEAVE THEM ALONE.
  5. You can check for done-ness by gently pressing the top of the patty. If it's super soft to the touch, it's still rare inside. As it gets closer to done, it will spring back a little more. With a thin (1 inch thick) patty, it should be done in about 7 minutes. Feel free to cook it a little longer, but don't cook it too long. An overcooked burger is NOT good.
  6. Place your hamburger on a bun and top it with guacamole (recipe below).

Guacamole
Tops 4 burgers generously... or serves one person who really likes guacamole.
  • 2 ripe Hass avocados
  • 1 very juicy lime (or 2-3 not so juicy limes)
  • 2 cloves of garlic, mashed into a paste or finely minced
  • 1 small onion, chopped finely
  • 1 small ripe tomato (If you can't get a good tomato, leave it out. Flavorless tomato does nothing for the guacamole.)
  • 1/4 cup of chopped parsley (If you like cilantro, use some.)
  • salt to taste (My taste is about 1/4 teaspoon.)
  • 1/2 jalapeno pepper (optional)

Don't bother chopping your avocados if they're ripe, which they really should be. Put your knife into the avocado until it touches the pit. Run it around the pit carefully, cutting the avocado in half the long way. Take half in each of your hands, twist to separate. Use a spoon to scoop the flesh out of the avocado skin or just squeeze until it's all out!

  1. Mix all of the ingredients together with a fork or your hands. I like to leave my avocado a little chunky.
  2. Add salt to taste and mix a little more.

Now you can top your burgers or grab some tortilla chips and enjoy!

Sunday, July 5, 2009

The Best Salad Ever


Get ready. This may be the best salad ever. I made it once for a school event, and since then, people get mad at me if I show up at without it. "Which salad?" I ask them. Fingers begin pointing, "You know which salad!" Just last week for an end of year pot-luck, I was assigned "THE salad" and given no choice in the matter!

I'm sharing it because everyone should be able to enjoy a good salad. The crisp, colorful veggies make the salad beautiful. The parsley, mint, lime, and garlic create the most tantalizing scent. Your taste buds will be thrilled by the tastes and textures.

THE Salad (a.k.a. Somewhat Sudanese Salad)
Serves 4, or 2 salad-lovers

  • 1 red bell pepper
  • 1 yellow bell pepper
  • 1 orange bell pepper
  • 1 large apple (Granny Smiths work well, or anything crisp and juicy and tart)
  • 1 chayote
  • mini salad greens or lettuce torn into smaller pieces
  • 1 cucumber
  • 1 small onion (or better yet, a quarter or half of a large sweet Spanish/Vidalia onion)
  • grape or cherry tomatoes
  • 1 avocado
  • 1 mango (somewhat firm)
  • 1 red or green chili pepper (optional)
  • 1 bunch of parsley (I prefer flat leaf parsley.) Make sure it's well rinsed to remove sand!
  • 10-20 fresh mint leaves
Dressing:
  • 2-4 cloves of fresh garlic
  • juice of 2-3 limes
  • kosher salt/sea salt
Here's the deal: Except for the parsley and dressing, EVERYTHING is optional! I choose fresh vegetables and some fruits that look good, are crisp, smell good, and are colorful. Use whatever you like! I like to add some ingredients that are sweet, some tart, some spicy...

  1. Chop chili peppers finely.
  2. Dice everything else to about 1/2 inch square/cube.
  3. Cut your grape or cherry tomatoes into halves or quarters.
  4. Finely chop the leaves of the bunch of parsley and throw it in with the rest of the ingredients in large salad bowl.
  5. Chop and mash the the garlic with a little salt. Work it with your knife until it is a paste.
  6. You're making enough dressing to just coat your salad. Make the dressing by mixing the garlic paste and the lime juice together in a small bowl. If your limes aren't that juicy, you might need more. Add salt to taste, 1/2 to 1 teaspoon should make your mouth water like a salt and vinegar potato chip!
  7. Don't dress the salad with your dressing until you're ready to serve it because the salt will make all the pretty veggies wilt! OR leave the salt out of the dressing completely, dress the salad with the lime juice and garlic and add salt to taste just before you serve.
  8. Mix it all up... toss it well... Hands and a large bowl work best for this.

Some notes:
  • Add feta cheese, crumbled - YUM!
  • Throw in a handful dried cranberries or rasins.
  • Mix (natural) peanut butter into the lime and garlic mixture until it's a smooth, soupy paste. Add lime and peanut butter and salt until you like the taste. Dress your salad.
  • Be bold - add some red chili powder to the lime/peanut/salt/garlic mixture :)
  • Be Sudanese and pour a little sesame oil over the top to finish it off.
ENJOY!

Creamy Avocado Goodness


Aseer avocat. Avocado juice. Didn't sound appetizing to me either, until I tasted the creamy, sweet concoction made from avocado, milk and sugar. I know, I know. In the US, most of us add avocados to salad or make guacamole with it. Milkshakes usually aren't green. But around the world, people who live where avocados grow eat them sweet as much as savory. In Brazil, you might find an avocado custard or ice cream. In the Philipines, you can try avocado mashed and mixed with sugar, milk, and ice. The aseer avocat I tried was Moroccan, and absolutely delicious.

Here's a recipe for an Avocado Milkshake:

  • 1/2 ripe Hass avocado
  • 1 cup of milk (I use skim, but you can use whole, evaporated, soy, rice, almond... you get the idea.)
  • 2 tablespoons of sugar (You can substitute honey, agave, etc. or leave it out completely.)
  • 1 tsp. vanilla extract
  • 2 tablespoons lime juice (optional)
  • 1-2 ice cubes (optional)
  1. Scoop avocado meat out of the skin and into the blender.
  2. Add other ingredients.
  3. Blend until smooth. Add a little more milk to thin to desired consistency and blend again.
  4. Pour into a glass and enjoy!
Some notes:
  • Choose a ripe avocado. Make sure it's dark and a little soft. If it's too ripe, it may be a little rotten and it won't taste good, so don't choose a very mushy avocado either.
  • You can make this already delicious avocado shake super rich and sweet by adding some sweetened condensed milk or cream.
  • Try adding a teaspoon of cocoa powder to make this a Chocolate Avocado Shake.
  • On a diet? Think avocados are too caloric? Check out this link to read about the health benefits of this creamy superfruit.
  • Don't know what to do with the pit? Grow it into a tree!